June 2023
New Features
The following features are new in this release:
Functionality | Description |
|---|---|
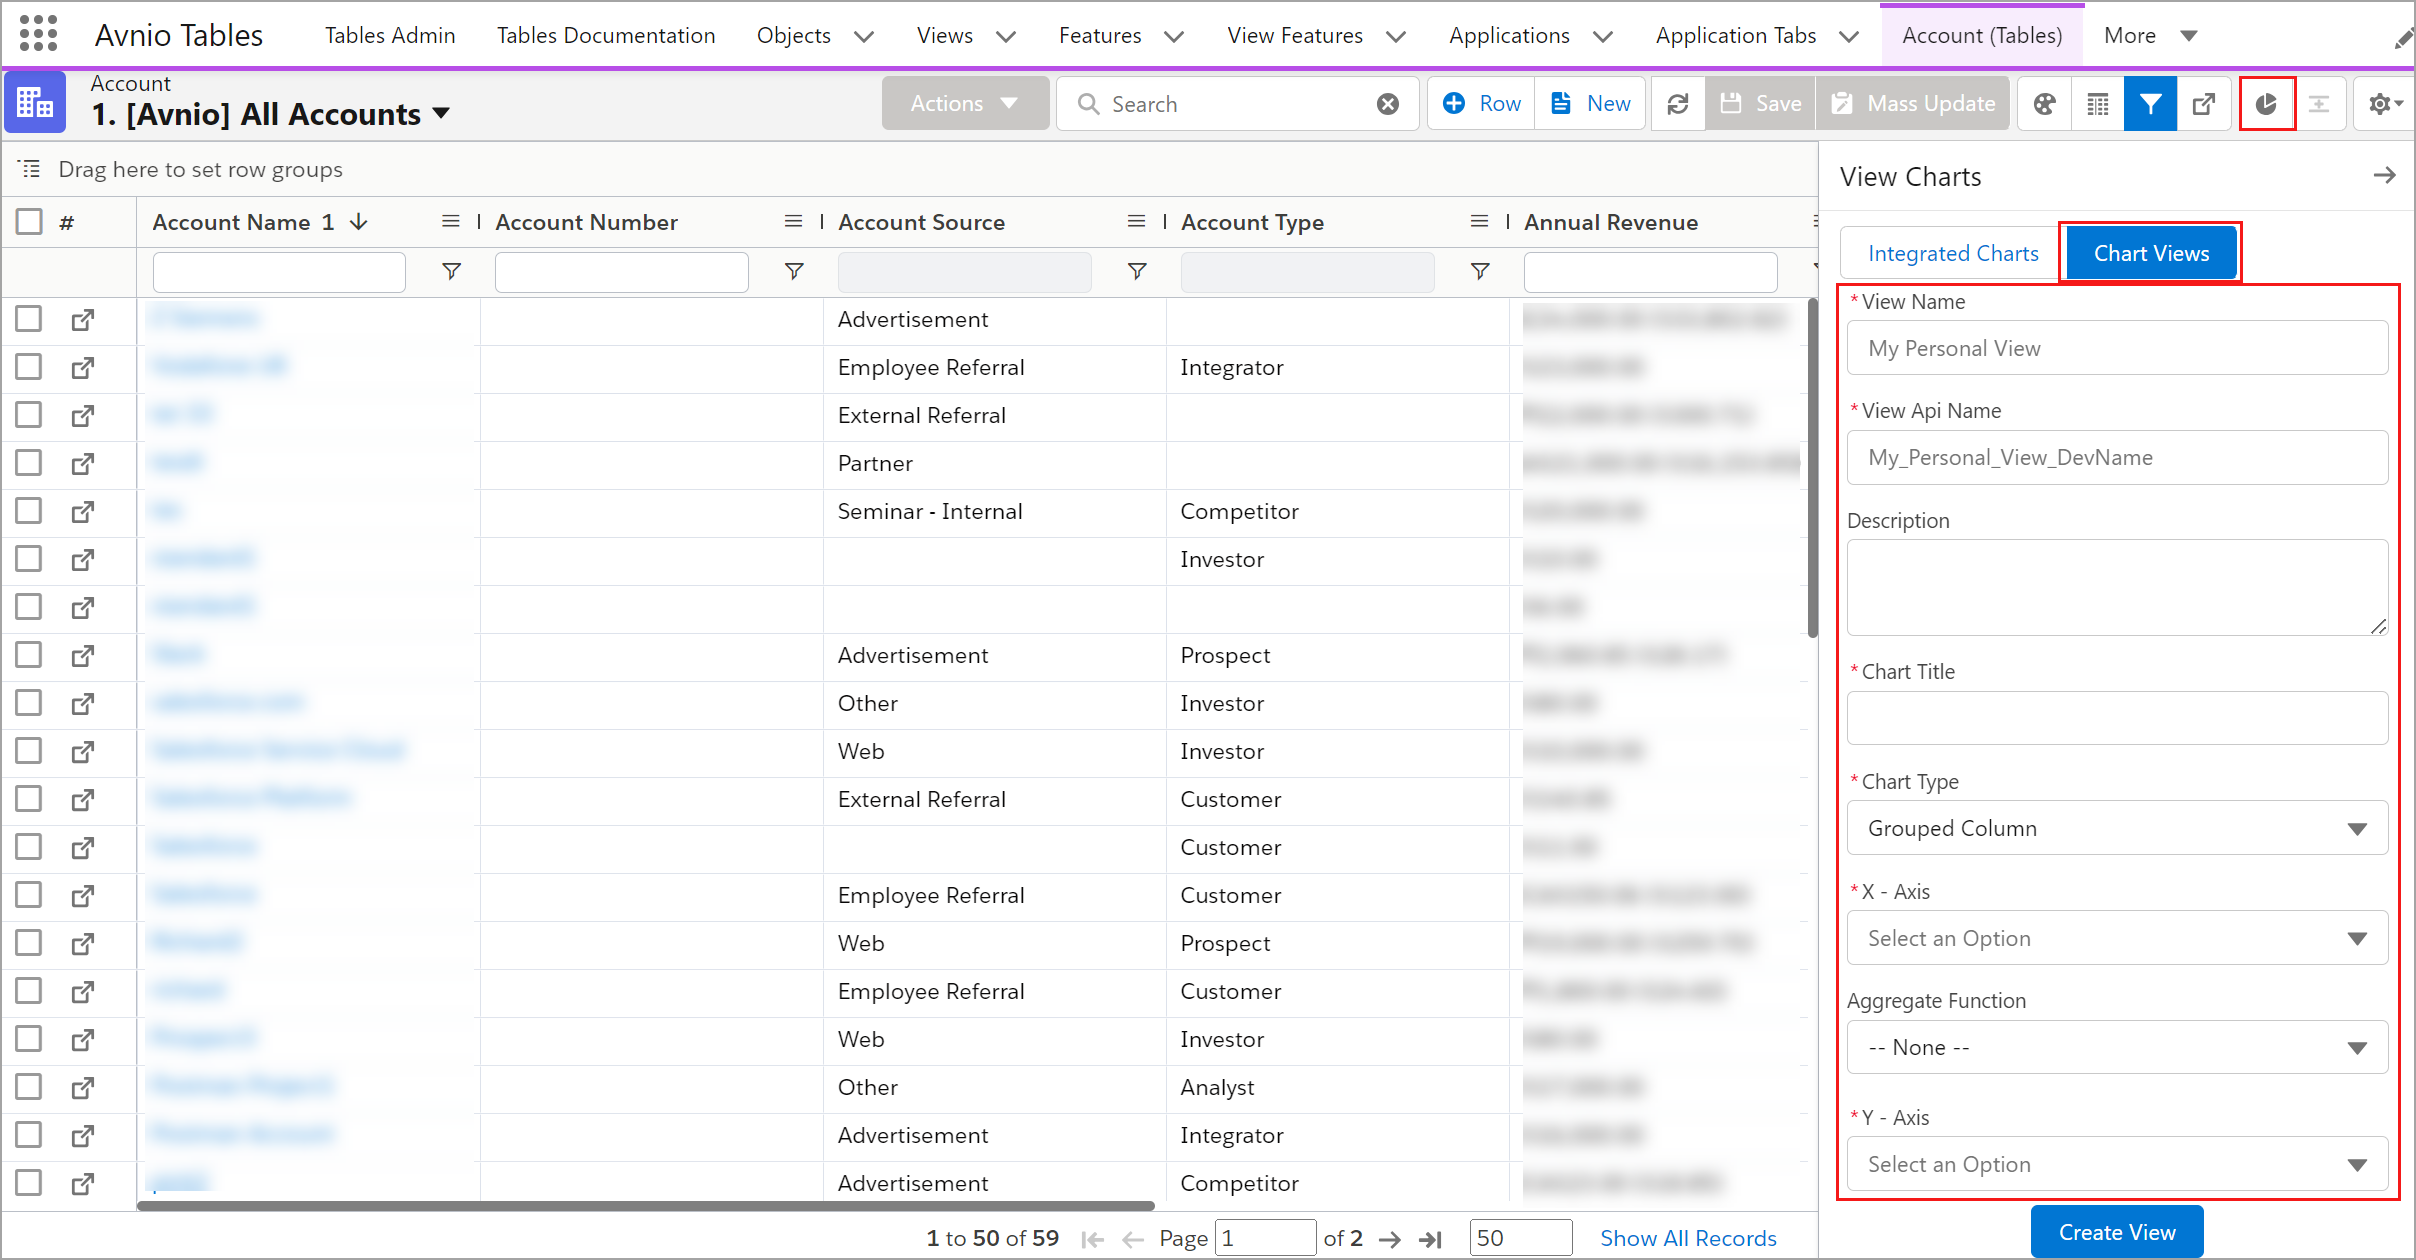
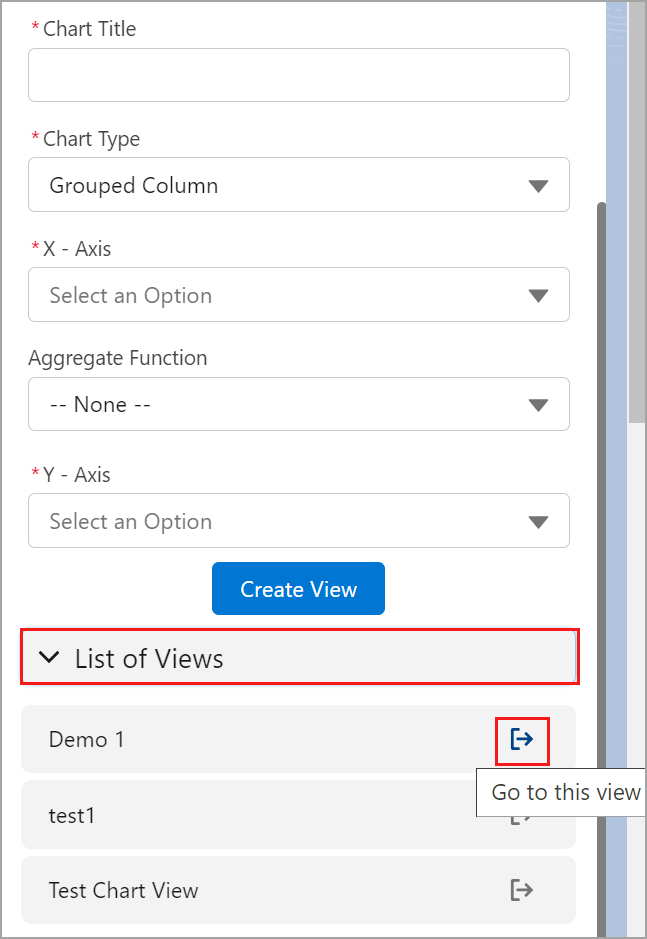
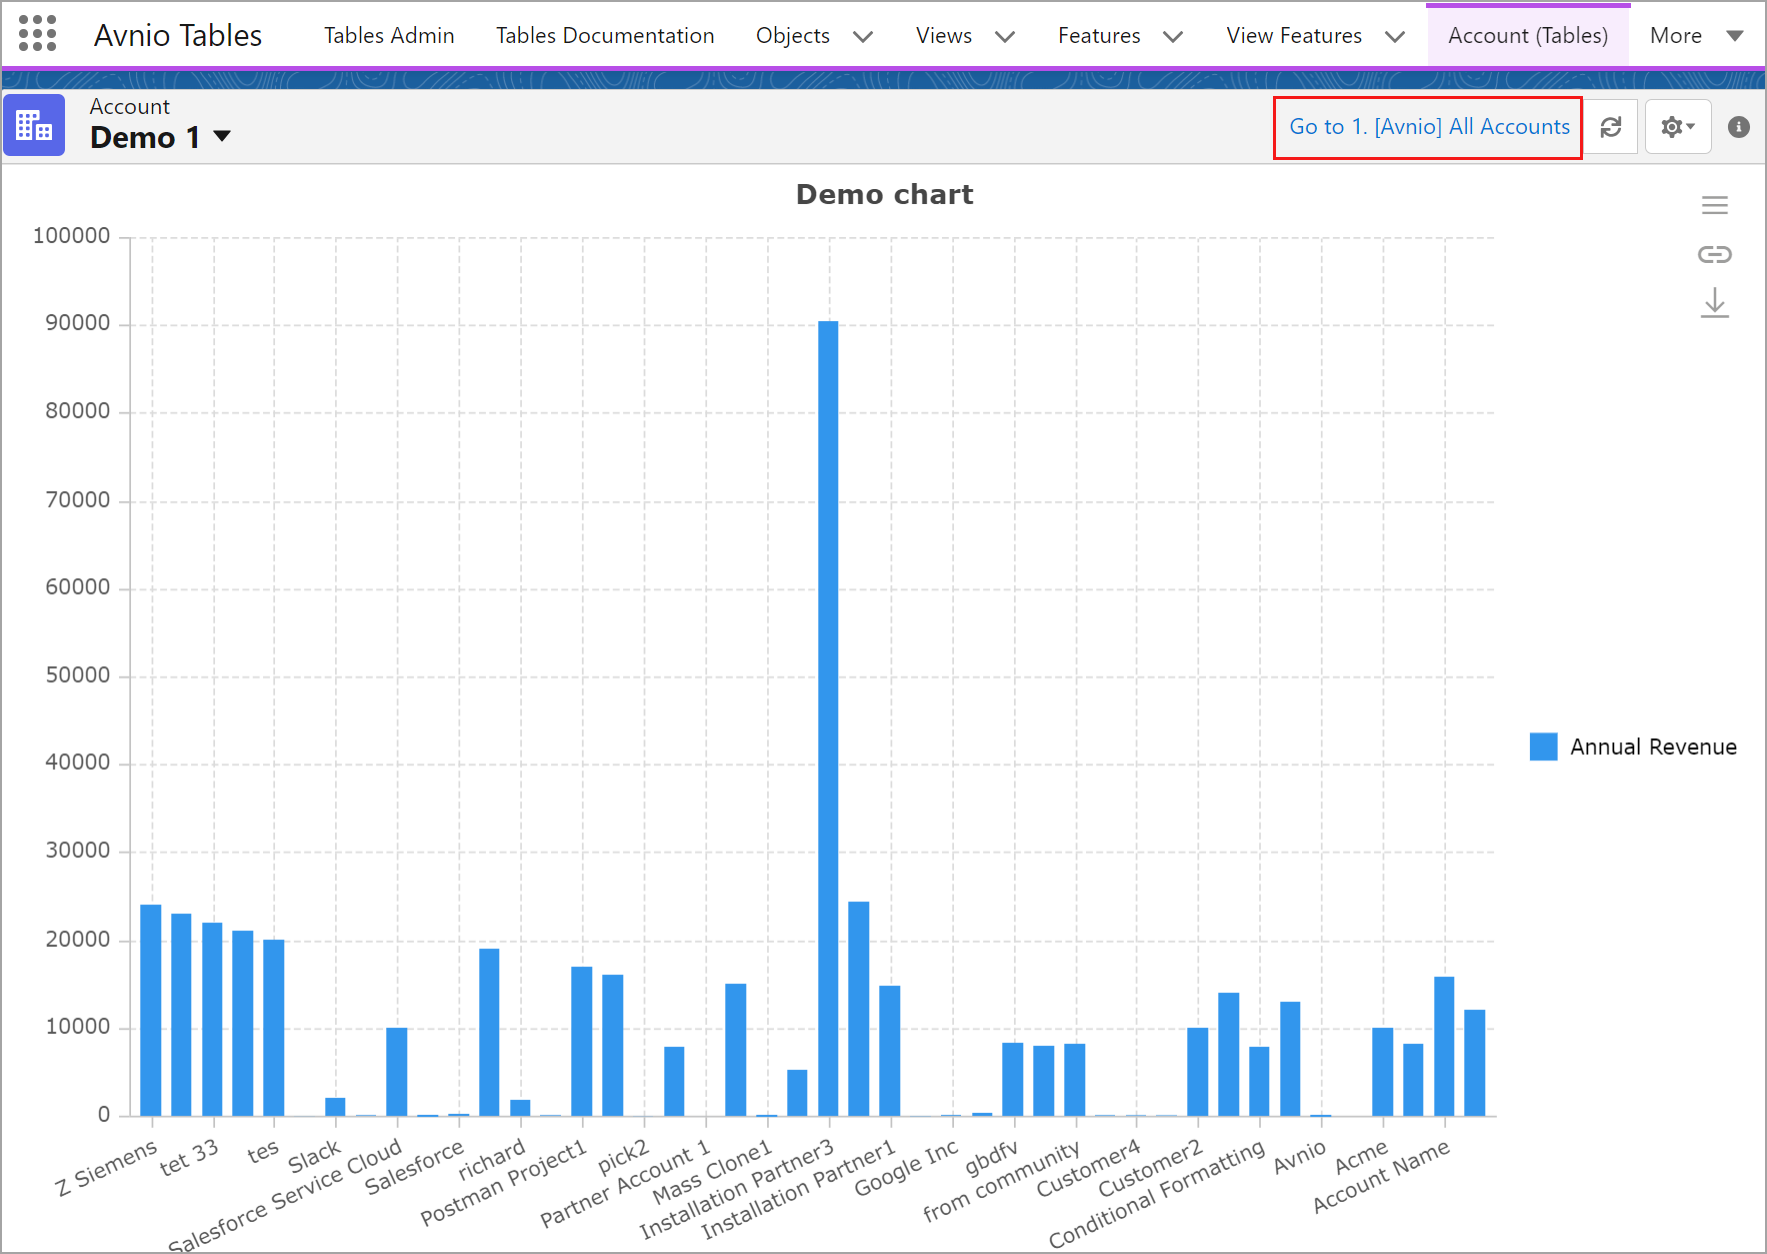
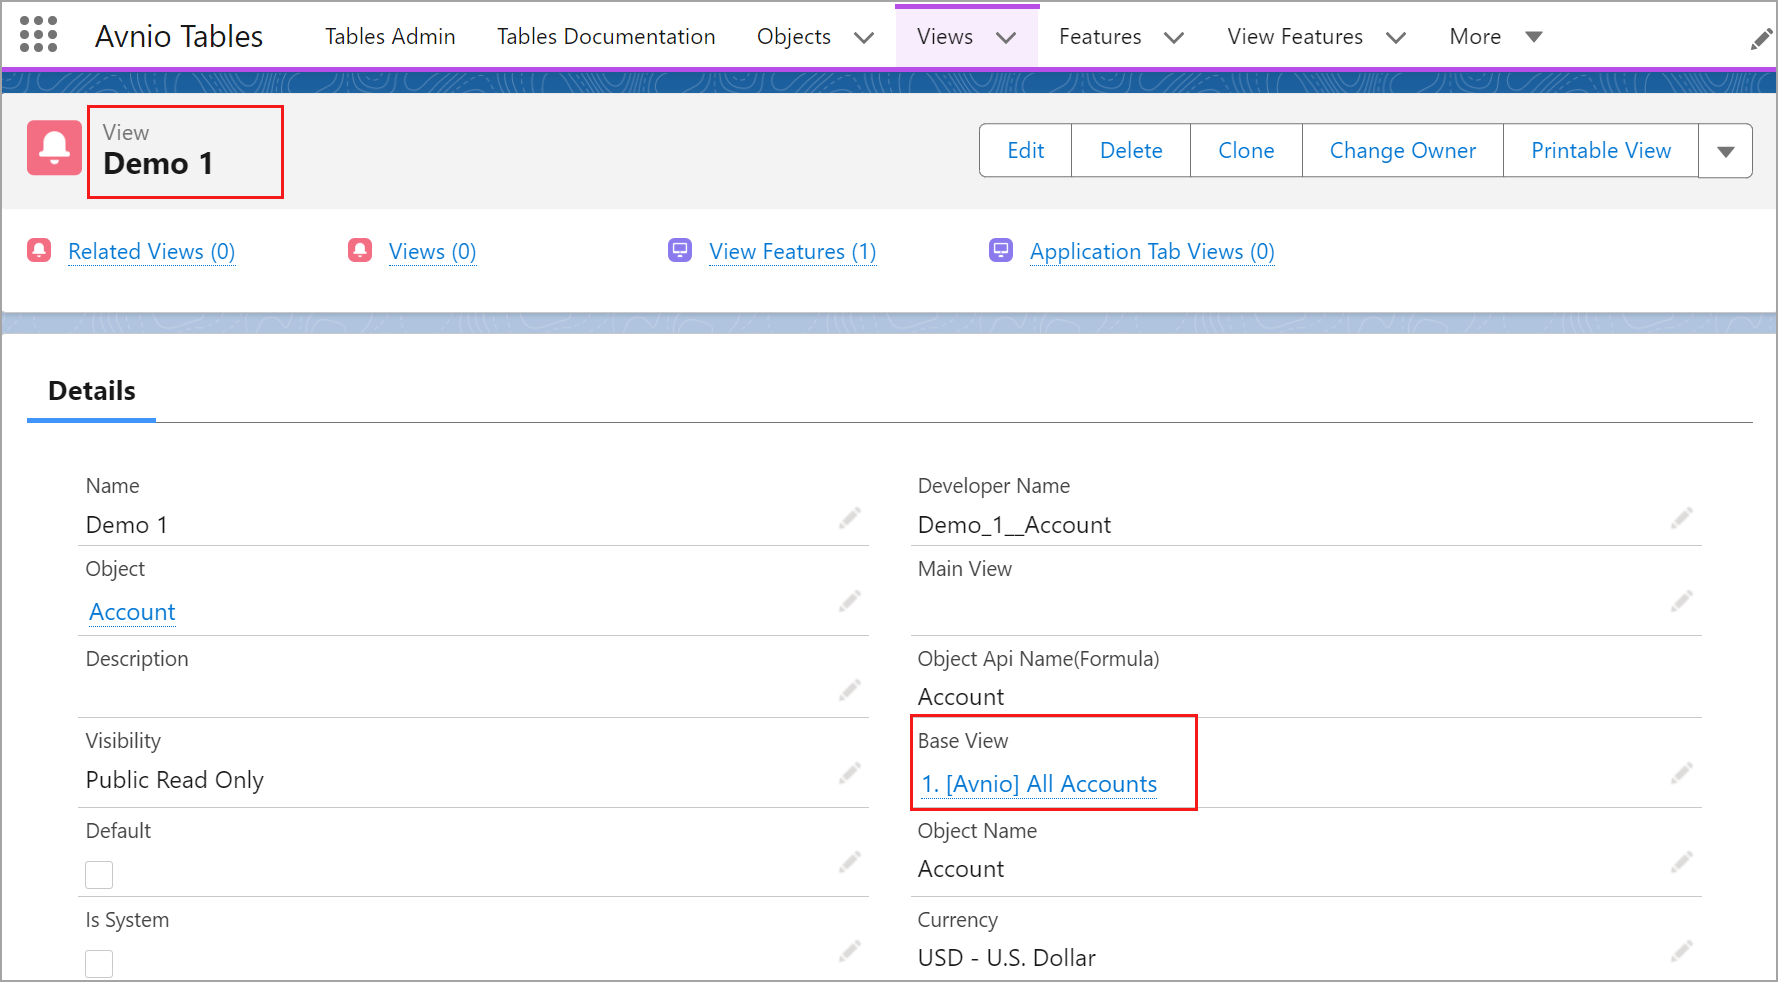
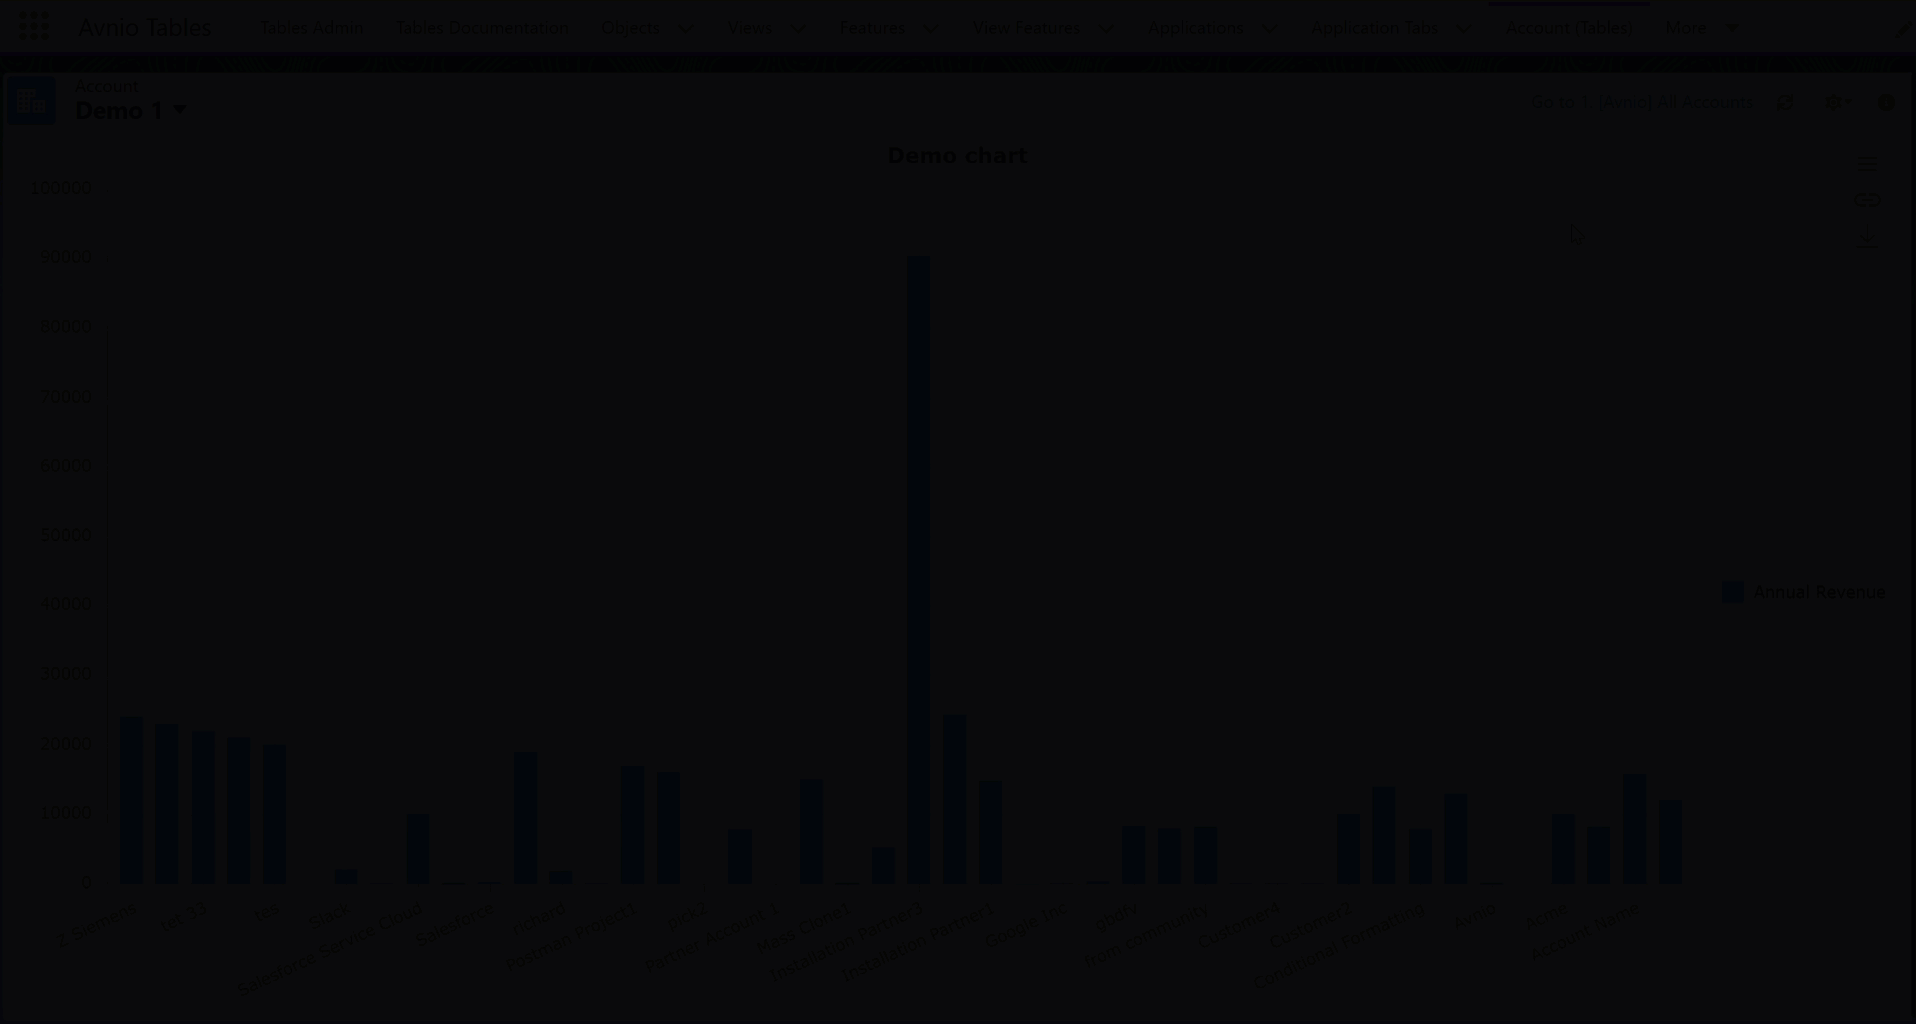
Separate Chart View | Introduced a new icon to create a separate chart View by clicking on any View > View Charts > Chart Views button on the Tables View page. You will have an option to switch between Integrated Charts and Chart Views. Integrated Charts - The chart created using this button are designed for the specific View and are in sync with the specific View, so they will be affected if you modify the base View or the main View. Chart Views - The chart View created using this button will act as a separate View, all the data for this View is taken from the base View, but this chart View will not be affected when the base View is modified. 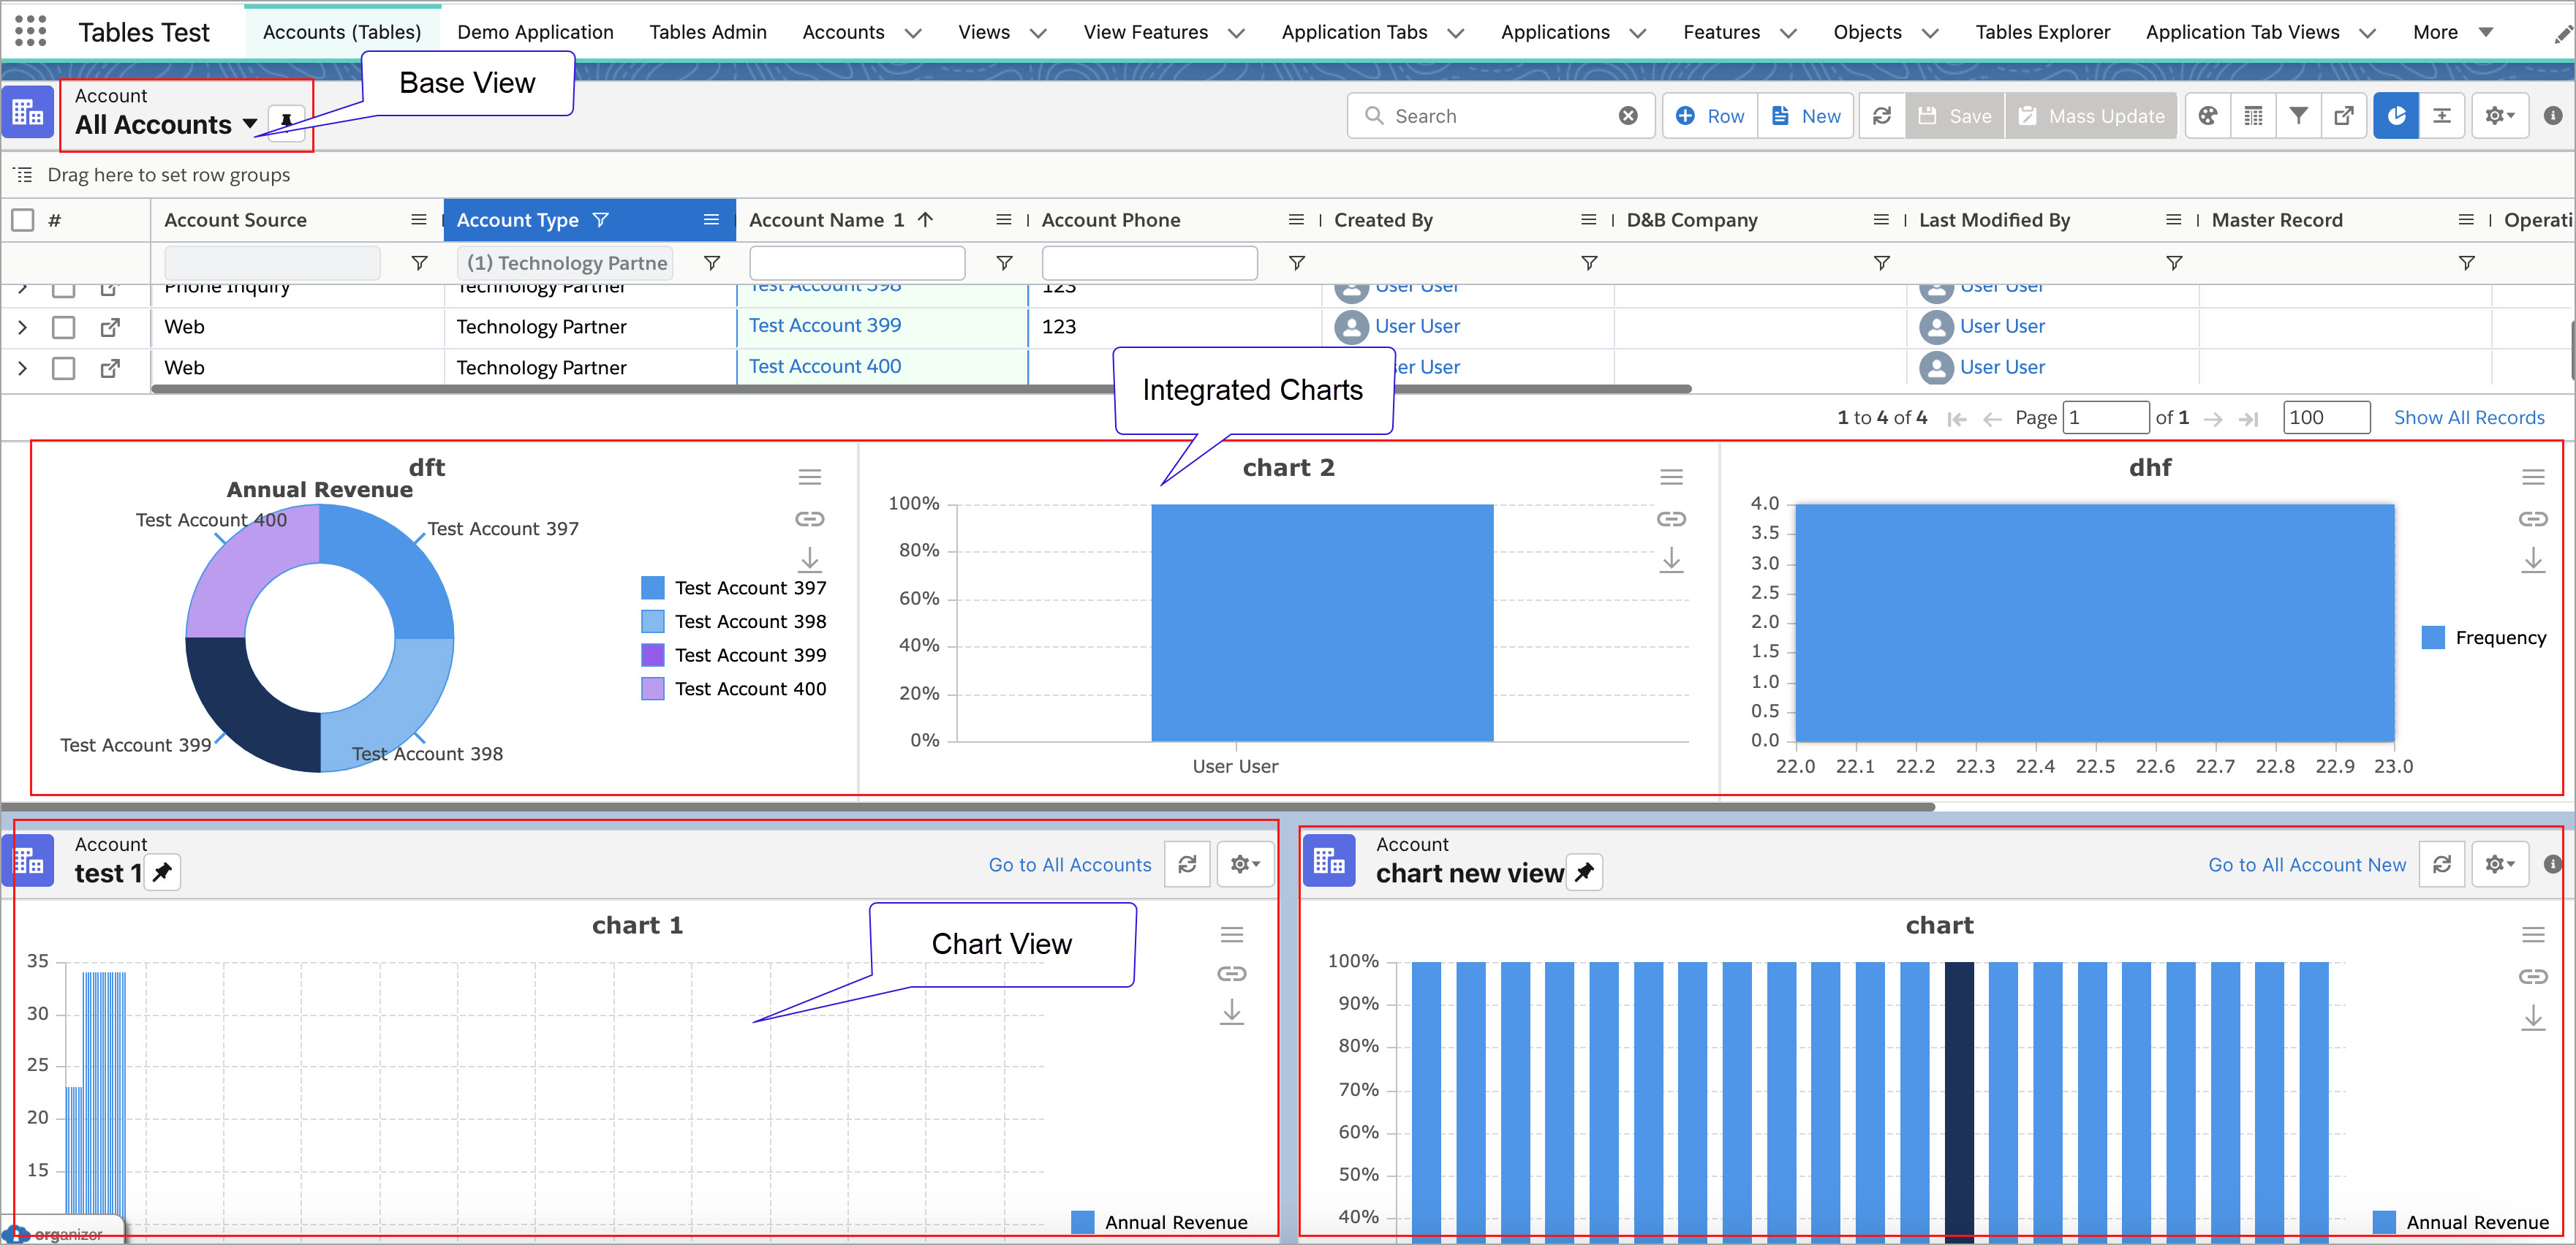 Click to enlarge
 Click to enlarge
 Click to enlarge
 Click to enlarge
|
Flow Custom Actions | For a unique user experience, you can create a Flow or use the existing Salesforce Flow for Custom Actions in Tables. You can configure the Tables with Custom Actions and use them in various Views. Firstly, you need to define the Feature and then relate it to View(s) in which you want to use the necessary custom actions along with the View Feature. Based on the type (flow) of custom actions, you can configure the JSON.
The following are the steps to create and implement custom actions on a configured View:
You can now verify the created Custom Action on the configured View from the following ways:
|
Enhancements
The following enhancements are new in this release:
Functionality | Description |
|---|---|
Load Multiple Tables | For a better user experience, user can now add multiple table components in a single lightning page. Various types of tables such as standard and custom object with default view as well as chart view can be loaded in a single page. 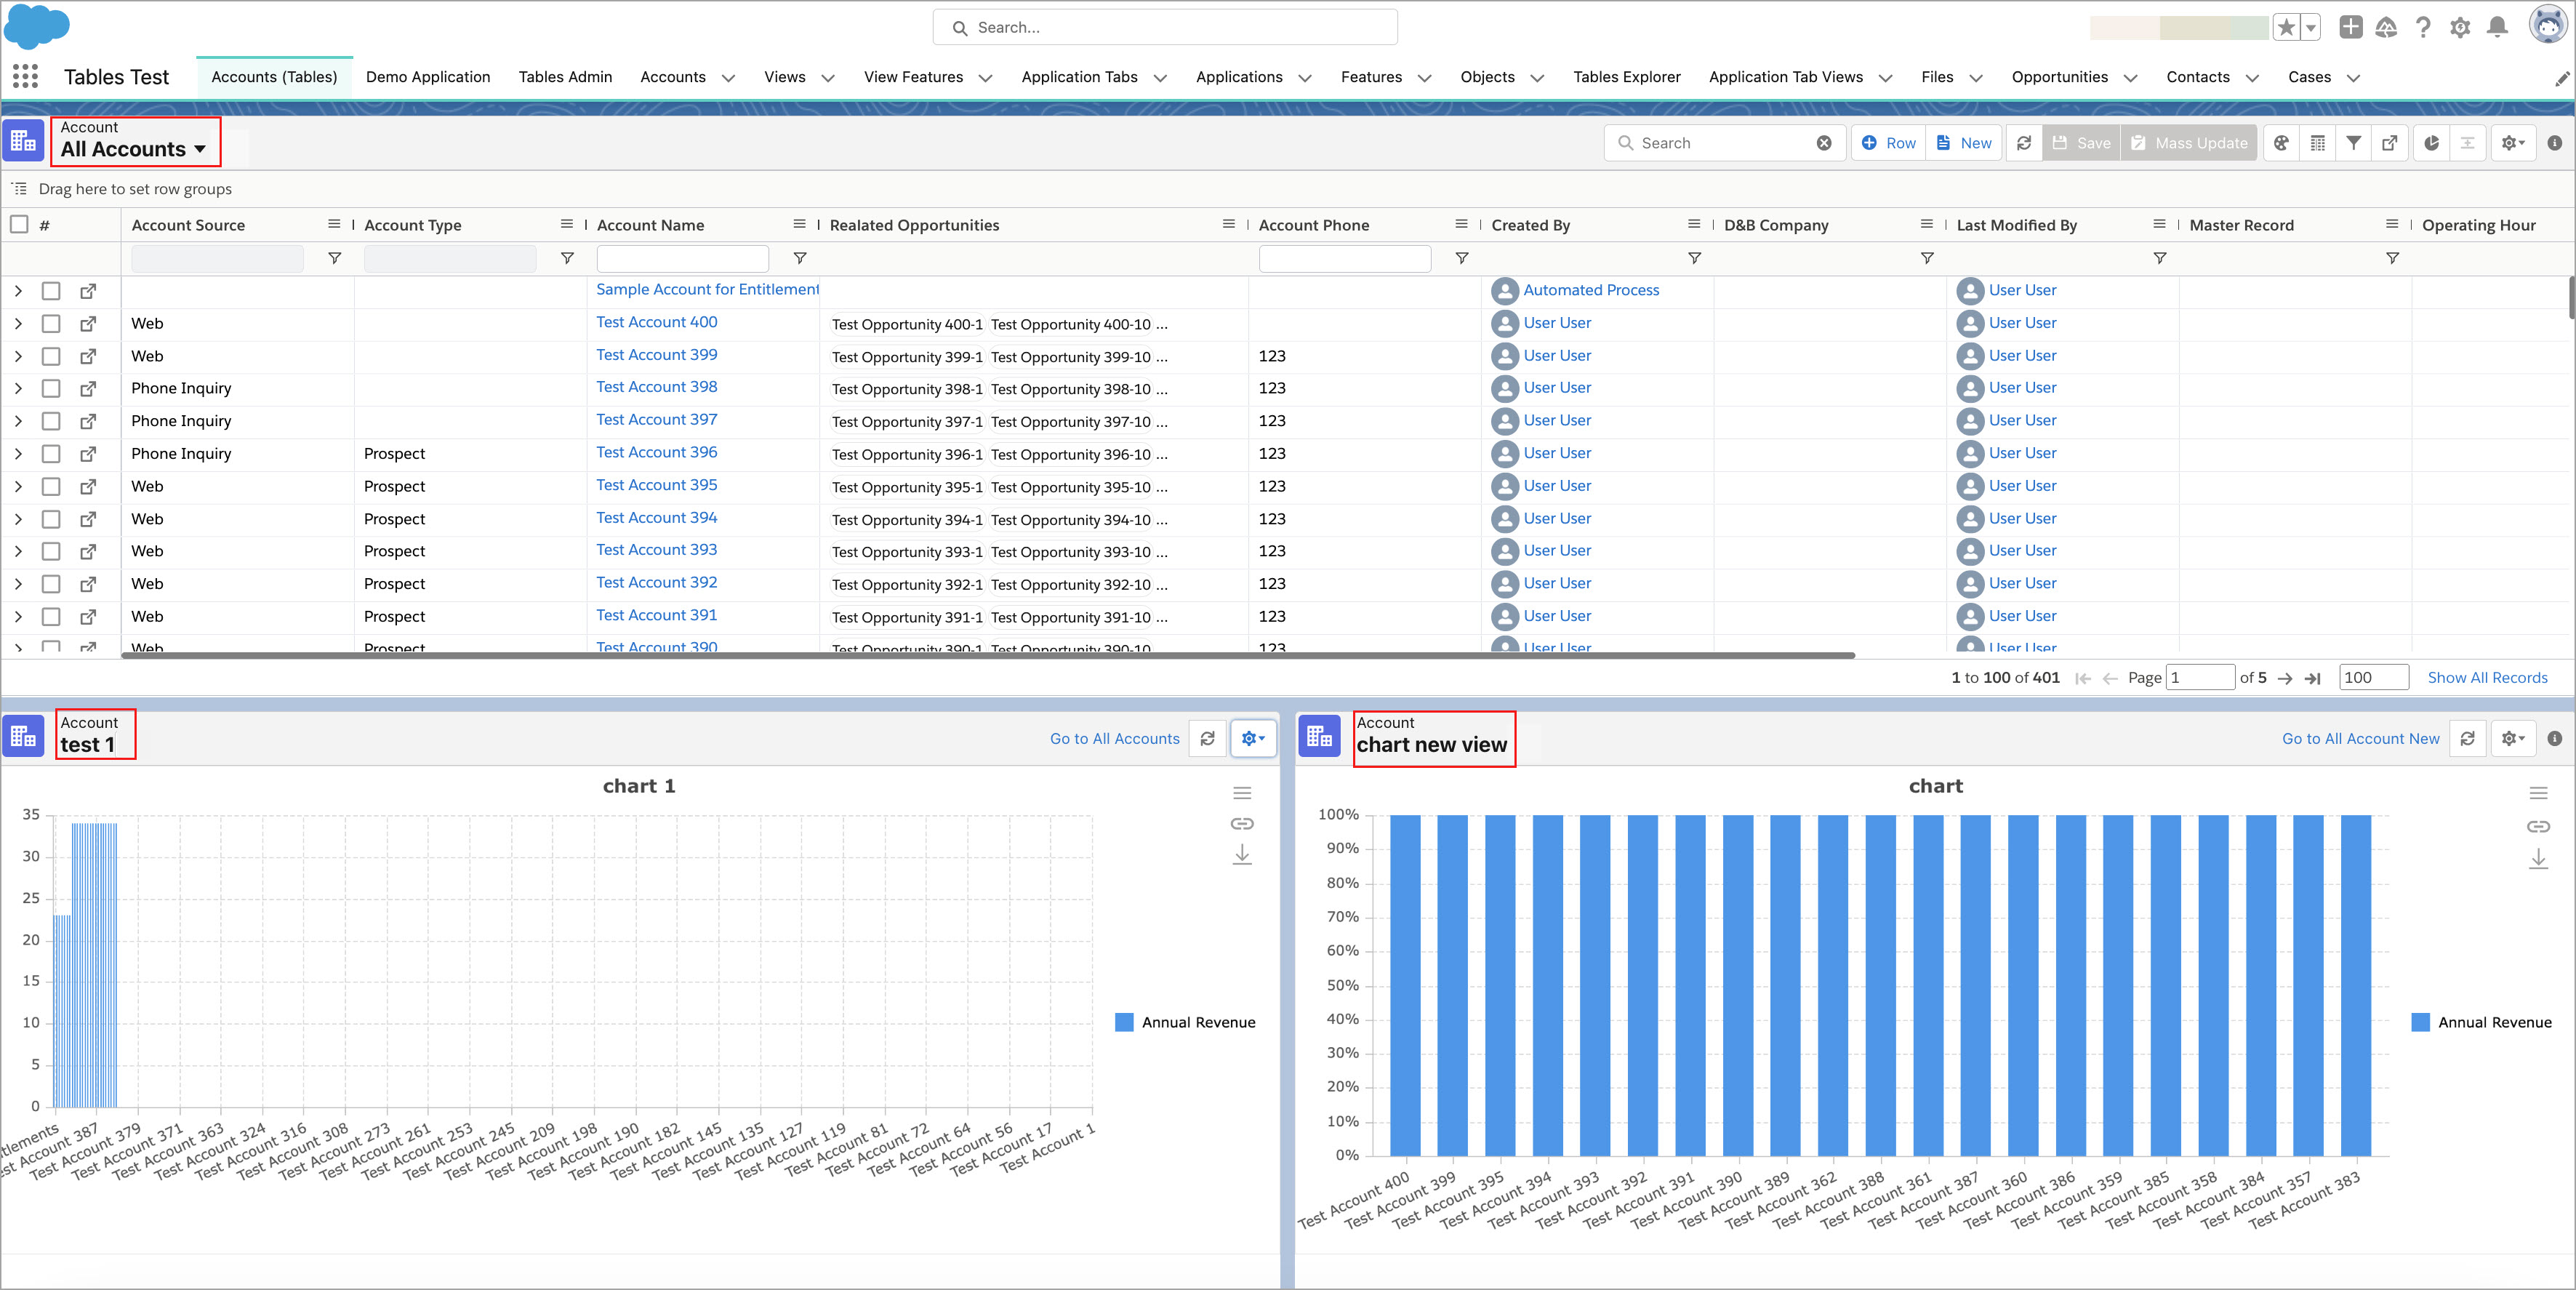 Click to enlarge The default loading time is set to 3000ms, the user with the required permission can update it from Tables Configuration > Tables Loading Timeout. |
Mandatory Fields Validation | The Chart View will now have the mandatory validation for fields and can be validated by clicking the Create View button.  Click to enlarge |
Mandatory Y-axis field | On creating a Chart View, when you select any value other than 'Count' from the Aggregate Function drop down, the system will now mark the Y-axis field with a mandatory(*) symbol. This indicates that the Y-axis field is required for creating a chart view. 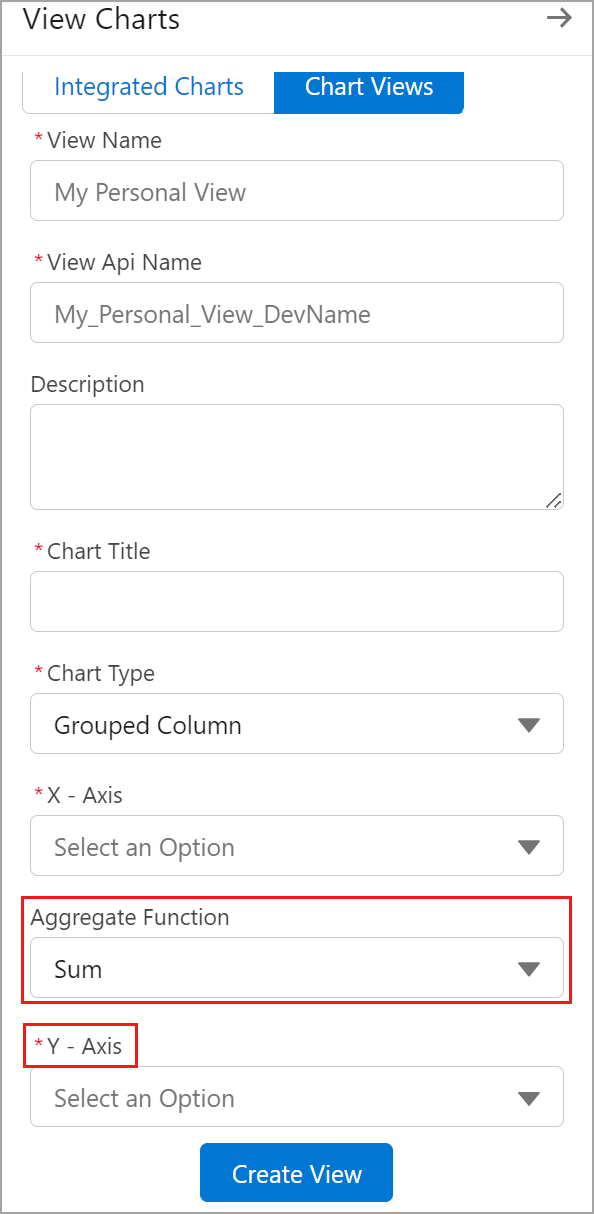 Click to enlarge If you select the value as Count, the Y-axis field will be hidden from the Chart View panel. |
Enhancement in Removing Filter Logic | Add multiple filters in Advanced Filter and apply some AND/OR logics between those filters, you can now remove any filter number from Filter Logic without changing the logic of the applied filter. Previously, when you remove any filter from the filter logic, the system was automatically changing the applied logics. The logic of the filters are applied in the below order on the Filter Logic. (1 OR 2 OR 3 OR 4 OR 5 OR 6 OR 8 OR 9) AND 7. When you remove any of the filter (8), the system will not change the logic of the filter as shown below, (1 OR 2 OR 3 OR 4 OR 5 OR 6 OR 8) AND 7.  Click to enlarge |
What’s Fixed
The following issues are fixed in this release:
While switching between the Views, the new View was not displaying the paginations (Show Pagination or Show All Records link) as per the last saved View.
Known Issues and Limitations:
The following are known issues and limitations up to this release: