Create View
This section describes how to create a View on a specific object that allows you to sort, prioritize, and analyze the record. Similar to a spreadsheet, Table View allows you to easily see your data in rows, wrap text, and resize or sort by any column.
Click to enlarge
To create a View of object
Go to App Launcher > Search and select Avnio Tables.
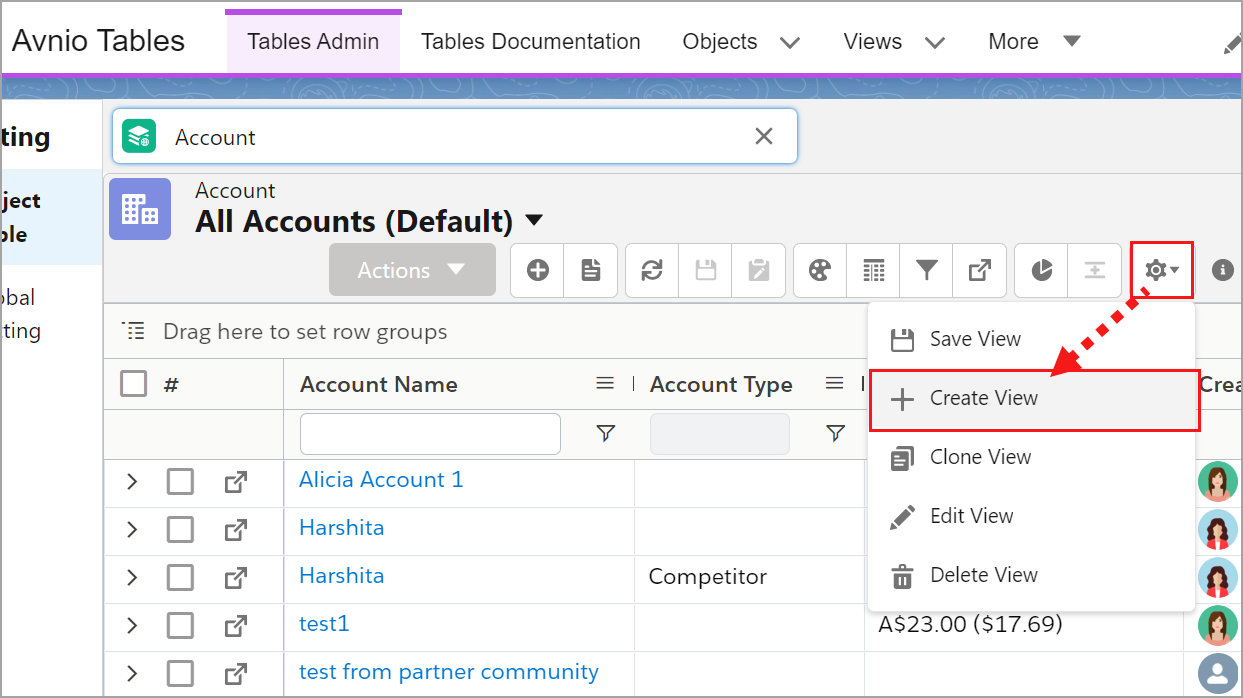
You will be redirected to the Tables Admin tab.Search and select an Object from the search box.
You will be navigated to the object list view drop-down page.Hover on the Setting (Gear icon) and select the Create View button.
You can see a create view pop-up screen.Enter the name in the View Name field on the popup menu.
The application will auto-populate the name in the View Api Name field.Enter the Description (Optional) and select Visibility from the drop-down.
Visibility is set to Private by default, but you can change it based on your business requirements.Click the Save button.
Table View’s visibility can be set to be Private, Public, or Public Read Only based on your business requirements. For more information, see here.
Click to enlarge
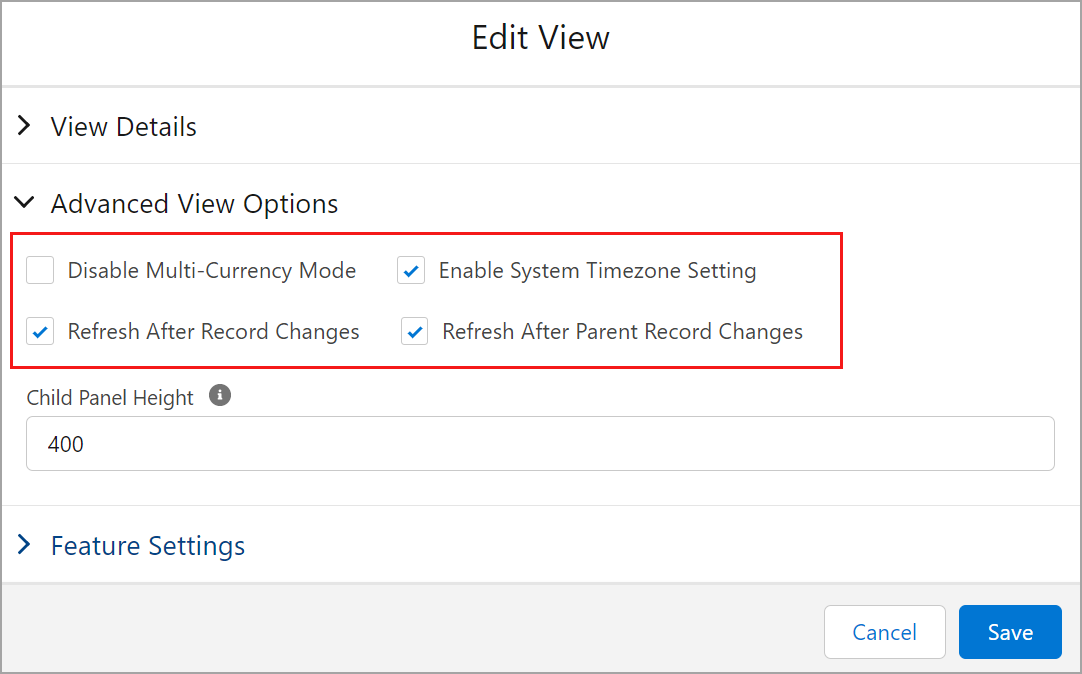
Advanced View Options
These additional settings and features available in Table View allow you to customize the data display and user experience. You can enable the below checkboxes to make various changes to the records in Table View.
Settings | Description |
|---|---|
Enable System Timezone Setting | Enable this checkbox to see the system/device’s timezone setting and browser locale. Disable this checkbox to display the login user's timezone and locale for date and time formats in the Table View. Technical Limitation: In input elements of various scenarios (inline edit / conditional formatting editing / filters editing), you can always see the browser locale and the device timezone setting for the date and time format in the Table View, whether the Enable System Timezone Setting checkbox is enabled or disabled. |
Refresh After Record Changes | Enabling this checkbox allows all the records in the Table to be refreshed once you save your modifications. To refresh a specific record where the changes were made and saved, keep this checkbox unchecked. |
Refresh After Parent Record Changes | Disable this checkbox if you only want to update and refresh the specific child field of a parent field. By default, the checkbox is enabled to update all the child fields related to the parent field once it is saved. |
Click to enlarge
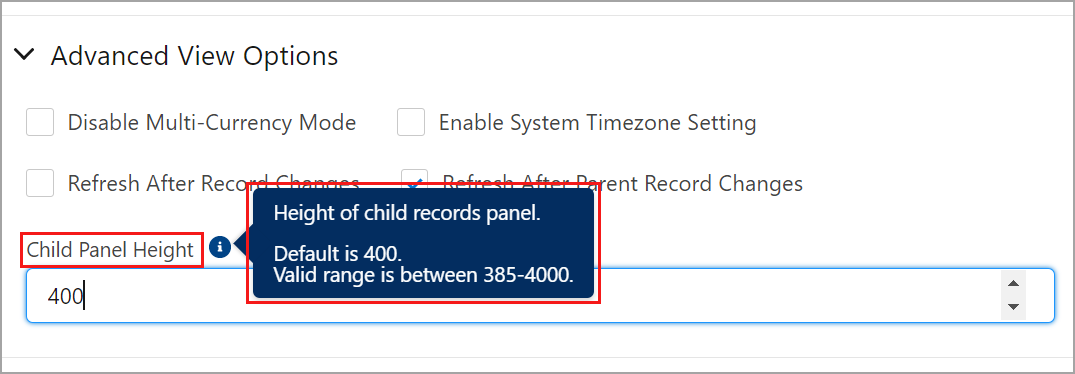
Child Panel Height
The height of a child panel refers to the vertical space allocated to display related records in a parent-child relationship. You can adjust the default height of the Child Panel by editing the Child Panel Height field in the Table View.
To adjust the height of Child Panel
In the Create / Edit View screen, click the arrow to expand Advance View Options.
Adjust the height value in the Child Panel Height field.
The default value provided in this field is 400. You can adjust the height range from 385 to 4000 by entering the value or clicking the up or down arrow, which will change the height of the Child Panel.Click the Save button.
Click to enlarge
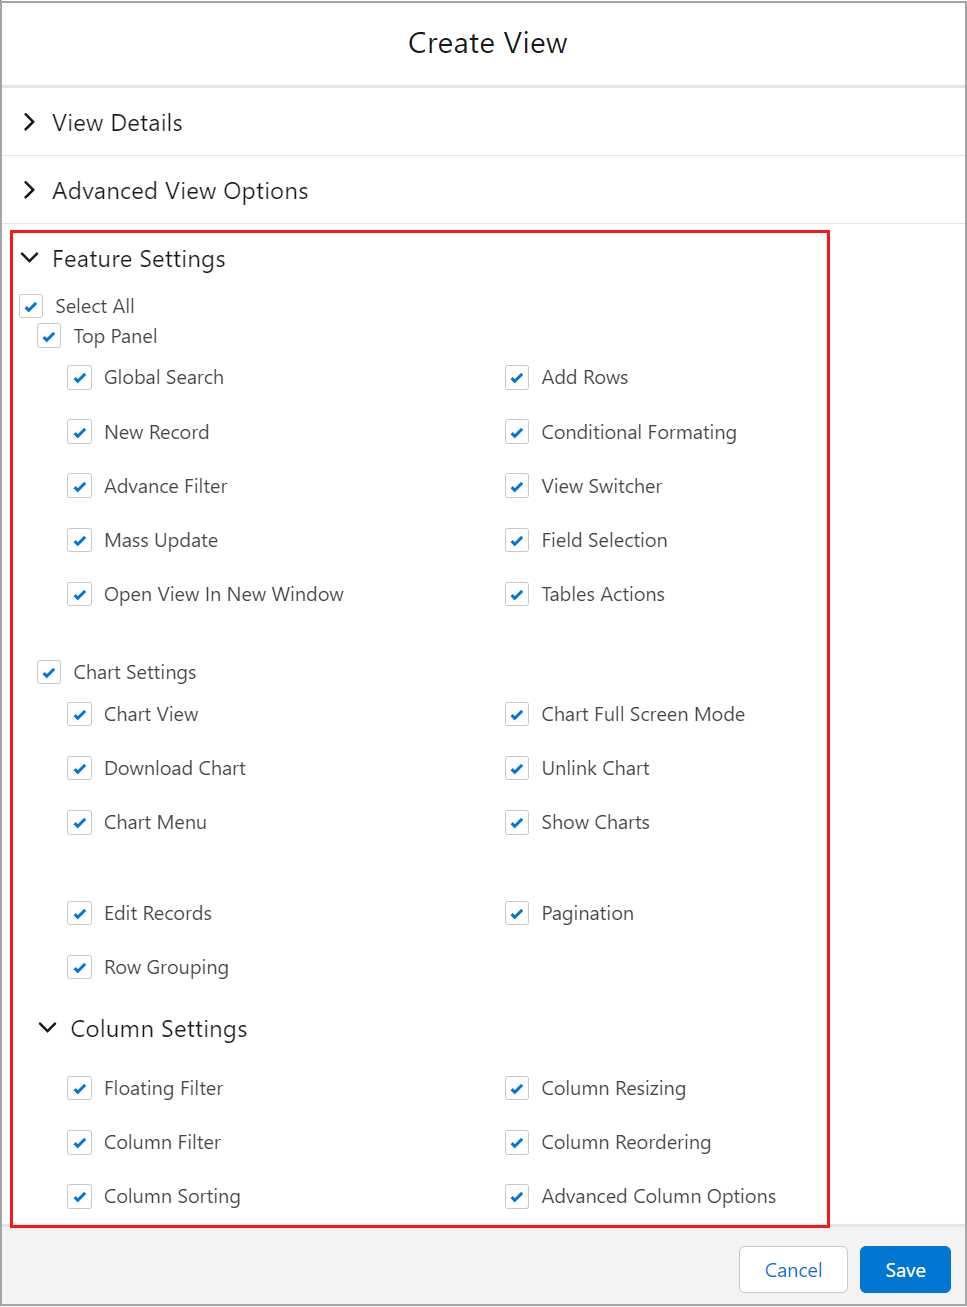
Feature Settings
You can turn ON or OFF view features based on your requirements, which will allow or prevent you from accessing specific features in the View. By default, the Select All checkbox is already checked to allow all the features to be enabled when creating or editing a View on an object.
The feature settings are majorly classified into two sections:
Top Panel: The features available in this section are situated on the top panel of the Table View.
Chart Settings: Enable the required features in this section to configure the charts such as view, download, unlink, and see the chart in full screen mode, and so on.
For more information on the above-mentioned features, see here.
Column Settings:
Enabling the required features will allow you to filter the column, column sorting, resizing, reordering and so on.
Click to enlarge
After creating a View, you can add required columns or fields to the respective View. For more information, see Adding columns to Table.